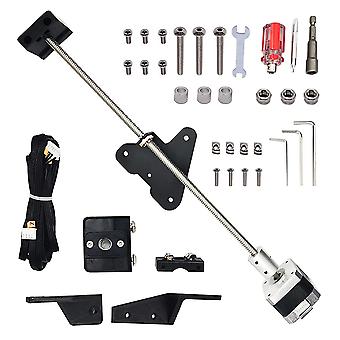
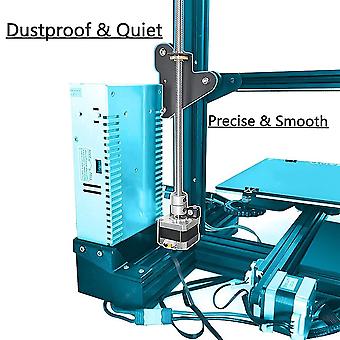
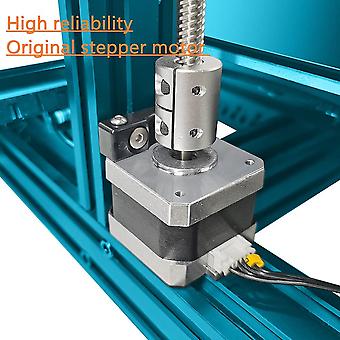
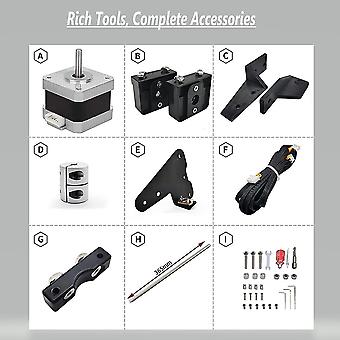
For 3 Dual Z Axis Upgrade Kit with Lead Screw Stepper Motor,3D Printer Accessories Parts for 3
- ブランド: Unbranded

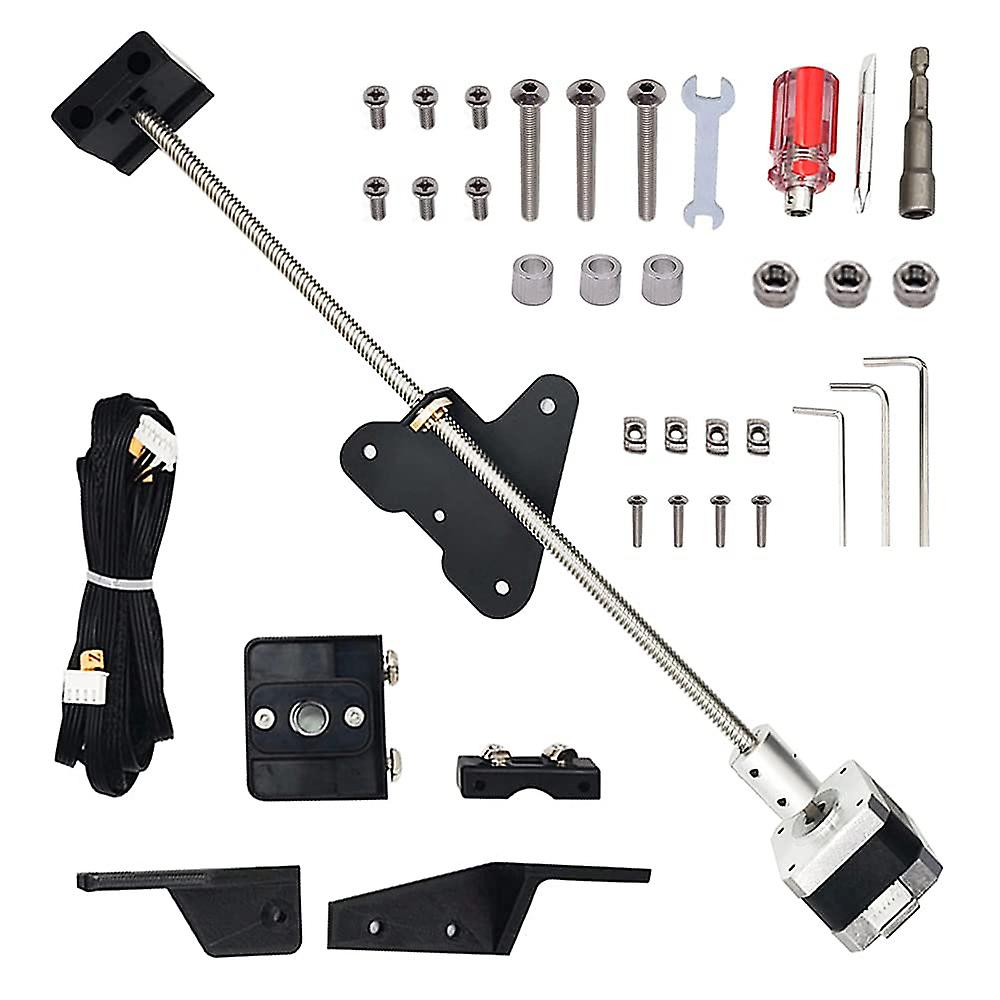
For 3 Dual Z Axis Upgrade Kit with Lead Screw Stepper Motor,3D Printer Accessories Parts for 3
- ブランド: Unbranded
| 価格: |
在庫あり
14日間返品ポリシー
支払い方法:
説明
For 3 Dual Z Axis Upgrade Kit with Lead Screw Stepper Motor,3D Printer Accessories Parts for 3
- ブランド: Unbranded
- カテゴリー: 3Dプリンター関連用品
-
色: as shown
- Fruugo ID: 220387324-469884197
- EAN: 4713125649455
配送と返品
3日間以内に発送
-
STANDARD: ¥249 - 間の配達 金 02 1月 2026–月 12 1月 2026
中国より発送。
ご注文の商品は、お客様の仕様に従い、万全の状態で配送されるように最善を尽くしています。しかし、もし注文に抜けがあったり、注文したものと違う商品が届いたり、注文に満足できないその他の理由がある場合は、注文全体やその中のいずれかの商品を返品し、その全額の返金を受けることができます。 全額返金ポリシーを見る
製品コンプライアンスの詳細
以下に概説されているこの製品に固有のコンプライアンス情報を参照してください。
以下の情報は、この製品を販売する独立したサードパーティ小売業者によって提供されています。
製造業者:
次の情報は、Fruugoで販売される関連製品の製造業者の連絡先詳細です。
- Love and Peace Shop
- shen zhen shi xiao duo la mu ying yong pin you xian gong si
- Fu Tian Qu Sha Tou Jie Dao Tian An She Qu Tai Ran Wu Lu 10hao
- Tian An Shu Ma Cheng Tian Ji Da Sha Liu Ceng 6a1-12
- Shenzhen
- China
- 518000
- hrtmfvjtnm@outlook.com
- 13692170145
- https://www.fruugo.co.uk/search/?merchantId=17044
EUにおける責任者:
次の情報は、EUにおける責任者の連絡先情報の概要です。ここで言う責任者とはEUに拠点を置く指定経済事業者で、EU域内で販売される関連製品に関するコンプライアンス義務を負う者のことです。
- 0utong GmbH
- 0utong GmbH
- Brehmstr, 56,40239 Duesseldorf
- Brehmstr
- Germany
- 40239
- info@outong.de
- 4921131054698